Friday, November 13, 2015

Online Instructors are Lazy and Make Students Teach Themselves (False Assumptions Series, #1)

There are many false assumptions abut online learning and the purpose of this blog series is to clear them up. My caveat is that these assumptions are only false when the online teacher is trained* to teach effectively in the online environment. One of the most dangerous assumptions is that a good classroom teacher will be a good online teacher. I believe this to be true with proper training, but without it, classroom teachers often fall short and it's the students who suffer most.

The assumption that instructors are lazy and make students teach themselves probably comes from experiences unfortunate students had with untrained teachers. Some untrained instructors think that to teach an online course you simply need to post readings, PowerPoint slides, quizzes and assignments, assign due dates and grade. This sounds like a face-to-face class without the classroom component. I could certainly see how a student in such a course would feel as if the instructor were absent and she is teaching herself.

So what's missing? The student may say that the teacher isn't teaching anything, which is sort of true. But that's not due to the fact that classroom component is missing. There are many highly successful online courses being offered and none of them involve physical presence. So again we ask, what's missing?
  1. Clarification on content
  2. Timely feedback on demonstrated performance and understanding 
  3. Spontaneous activities and explanations
  4. Interaction with the instructor and classmates
  5. Student-driven discussion and Q&A
  6. A sense of community and humanity
If an online instructor could find a way to incorporate these elements into his course, I am confident that his students would be satisfied with the instruction, support and engagement they experience. And it is certainly possible!

Am I missing any elements? Or do you have a different opinion? Please share your thoughts.

*I do not wish to discount or belittle self-trained instructors. I simply want to emphasize that learning the strategies and techniques for teaching online often leads to success, whereas instructors who do not learn and apply best practices often fall short, even if their intentions are good and their classroom teaching skills are noteworthy.

Thursday, October 30, 2014

Discussion Boards and Time Management

It becomes very easy for discussion boards (an online courses in general) to take over an instructor's life, especially if you teach a large online class. I am still figuring out the most efficient processes for me, but here is what I've learned so far.
  1. When it comes to managing your discussion boards, choose a frequency, length of time and time(s) of day that are manageable, and stick to them. You don't want your students to think you created the course and then abandoned them, leaving them to fend for themselves the entire semester. But you also don't want to feel that your course has taken over your life. 
    • If you let your students know when, how often and in what capacity they should expect to "see" you in the forums, then you won't disappoint them and won't overwhelm yourself. 
    • If you have a discussion that is meant to be student-directed (with little to no facilitation from the instructor) make sure the students know upfront so they aren't left to wonder where their teacher went. 
  2. Read the posts in order so they make sense, but don't worry about grading at that time. 
    • My first semester teaching online, I thought I would save time by grading as I read through the posts chronologically. This actually took more time (at least with the way Blackboard is set up) because of all the clicking and page navigation I had to go through to get from the post to where I could submit grades. 
    • What worked better was when I would read through the discussions chronologically, facilitating as appropriate, and then would grade everything at once, by student, after the due date. In Blackboard, instructors can click on a student's name and view all of the posts s/he contributed to a single forum. From there it becomes easy to see how many posts s/he wrote (you my have a minimum required), whether the posts met the requirements outlined in the grading rubric, and submit a grade from there. I thought this would be confusing at first (since I am rereading the posts out of order) but since I had already read them all over the course of the week (and in chronological order) the quick review I would do for grading purposes was enough to remind me of the context in which they were written. And then everything does make sense. 
  3. It is important to participate in the discussions as a facilitator, to ensure that the goals of the discussions are met. You don't have to be active in every discussion to do this (though you should be clear about when your students should expect to "see" you in the conversation, as mentioned above). You could and should follow up with lessons learned, a summary or another brief response that shows you were present for the discussion, whether or not you were active in the conversation. 
    • To save time, you can have elements of the message pre-written: if you know you want to point out certain concepts, questions to ponder, etc., there is nothing wrong with having all that drafted ahead of time. But make sure that there is also an element of personalization so your students know you're truly part of their learning experience, and modify/add any details to make your message relevant to the current students and discussion.  
    • In my class, I address the questions/topics discussed and may write a blog post to elaborate. If it's an issue I addressed in a previous semester, I may send a link to the archived blog post and articulate how it is relevant to the recent discussion.
  4. Utilize Blackboard's rubric feature, which allows you to create a rubric directly in Blackboard. It takes time to create a rubric from scratch, but if you develop one that is clear and comprehensive, it makes your grading process very quick and easy. Once a rubric is created and attached to the discussion forum or thread, you simply have to check the appropriate boxes; once you hit "Submit", the grade tabulates and auto-populates in the Grade Center.  If your rubric is comprehensive, there is no need to provide much if any written feedback because the grading criteria clearly articulate why the student earned the number of points s/he did.

Monday, October 27, 2014

Tips for Synchronous Learning (Collaborate sessions)

In my online course Successful Teaching Online Mentoring Program (STOMP), my instructors (aka my students) were discussing the use of Collaborate as a virtual synchronous teaching tool, and had a few questions I would like to answer here.

Whenever you incorporate a new technology tool into your curriculum, it is important to evaluate how effectively it helps your students meet the course outcomes. Utilizing a synchronous learning tool like Collaborate could certainly add positively to your course, since it allows for real-time discussion, lecture and collaborative engagement. Collaborate is probably the closest we get to offering the face-to-face classroom experience in an online setting. 

Snow Day Solution

Some of the instructors I work with use Collaborate when there is inclement weather and they still wish to hold class. The session can be accessed live for anyone with the technological capacity to join the lesson, and the archived recording is available for those students who were unable to join the live session. Chicago had a terrible winter this past year (January 2014) and in response, many instructors came to me trying to figure out how to make up for the lost time; Collaborate was one of those solutions.

Office Hours and Study Sessions

Other instructors use Collaborate regularly for office hours; they tell students they will be available online during certain days/times of the week and any student can "drop in". They may also offer midterm and final review sessions via Collaborate. Personally, I use Collaborate for one-on-one student meetings, and so far my instructors have appreciated the opportunity and support.

Tips for Teaching with Collaborate

Ideally, if you teach an online course and wish to incorporate Collaborate (or any tool for synchronous learning), you will hold regular sessions. With any online tool, there is a learning curve to consider. It may be rather frustrating to your students to go through the (potentially stressful) process of learning a new technology tool just to use it once and never again. If you are going to require the use of Collaborate, assign a few synchronous sessions so that your students can feel the sense of accomplishment that comes from becoming comfortable and familiar with the new tool. Furthermore, if you "require" participation in synchronous learning (as opposed to just offering optional study sessions or office hours), include the dates/times of the sessions in the course description so that every student is aware of the time commitment before enrolling in your course.

Should you decide to utilize Collaborate or another synchronous learning tool, it will help if you provide your students with tutorials so that they can prepare for the experience and hopefully have less to troubleshoot during the session. Admittedly, I have found that even with my students, who are all college instructors, it is hard to get them to watch/read the tutorials prior to the synchronous learning session. To ensure they do the prep work, you may want to assign a brief quiz that tests them on troubleshooting techniques.

Friday, January 10, 2014

How to Proceed with Developing a New Online Course from Scratch (in 4 easy steps)

Recently, an instructor asked me for a brief outline of how to proceed with designing and developing an online course from scratch. Here was my advice:

To give a really general outline, here is how I would proceed:
1.    Review the course objectives/student outcomes
2.    Determine what topics need to be covered and in what order to meet those objectives
3.    From there, create an outline covering 16 weeks (or however long your course will be) and then fill the info in week by week. What outcomes are met each week? (Write those down) Then what assessments will you assign to show that the students have met the student outcomes? Finally, what activities will the students need to complete in order to succeed in the assessments?
4.    Build the assessments, rubrics and activities

Do not simply go by the book because often times the topics emphasized by the text books are not the ones that best meet the outcomes, and some areas that the text glosses over are actually more important for your students to learn. Therefore, always use your course objectives and the outcomes assigned to each week as your guide.

I hope this helps!

Monday, October 28, 2013

Online Synchronous Learning: Real-Time Distance Learning

When teaching an 8-week course to instructors about how to teach online successfully, I try to include an example of every major technology and strategy. With all of the useful free tools out there and the varied teaching methods they introduce, this is truly an impossible task. But that doesn't stop me from trying! Here I introduce a difficult technology to master, but one that has endless positive potential for participating students.

Online Synchronous Learning: If you're going to use it, make it a regular event

Recently in my online teaching course, we had our synchronous learning experience. We only have time for one session, because again, it is an 8-week course and I am trying to use our limited time to introduce several different educational technologies. I explained to the participants that this is unideal... when they teach online, if they decide to incorporate synchronous learning into the online experience, it should be a regular and recurring event. The reason being that it takes a couple sessions for most people to get comfortable with the technology. If you are going to take the time to teach your students the technology, and if they are going to make the effort to struggle through the learning it, you might as well use it enough times to make the investment of time and energy worthwhile.

Make sure the tool helps your students meet the course goals and outcomes


As with all educational technology tools, synchronous learning may seem exciting and engaging, and may meet a need. But it is imperative that you evaluate whether this tool (or any other) truly helps your students successfully achieve the course goals and meet the specified outcomes. After all, when transfer schools, graduate programs and potential employers look at a transcript, they have certain expectations about what a grade is a particular course really means. It is our responsibility as teachers to make sure that our assessment of a student's performance lines up with grades given and associated outcomes.

When done right, online synchronous learning has great potential value to students and instructor alike

Not all synchronous learning sessions and instructors are created equally. I consider myself an intermediate synchronous learning instructor, but am getting better every week since I am teaching a regular online Hebrew language class. However, even if I am still honing my skills, and I believe a lot of teachers share my shoes, I have experienced many synchronous learning sessions and have a good idea of what works, what doesn't, what's engaging, what's boring and the value to synchronous learning beyond the information that is delivered from instructor to student.

Building student community and introducing a touch of humanity

A good synchronous learning series can help bring students together, establishing peer camaraderie and a comfortable, safe learning environment. It can also introduce humanity, which is sometimes missing from fully asynchronous online courses. When students work in small group scenarios (which is a possibility with all the major synchronous learning and meeting software), they are able to collaborate and interact with classmates even if one student is in Palatine, IL and the other is a soldier stationed in Germany. And like a face-to-face course, the instructor can use real-time inquiry and polling to get a sense of student interest, understanding, concerns and questions.

At minimum, participation can include raising your hands, voting and chatting... much like participation a large lecture course

Most major synchronous learning and meeting software includes the option of "raising your hand"; voting thumbs up or down; highlighting, spotlighting or marking up whatever appears on the computer screen; and even chatting from one student to another in a semi-private conversation (semi-private because only the participating parties AND the facilitator can read the chat.)

Real-time group work is a major plus

One of the best features of synchronous learning is the facilitator's ability to put students into groups to have them work on a group project or participate in a group discussion. Once the students are comfortable with the technology, they will be able to talk to one another, collaborate via the whiteboard to communicate their ideas to one another and the class at large, share their computer screens with one another, take group quizzes, and even create full presentations.

In a face-to-face small group discussion scenario, the instructor may walk around from one group to another, doing her best to listen in and observe the dynamic, making sure the students are on task.  Similarly, in an online synchronous learning session, the instructor can virtually jump from one group to the next doing the same thing without disrupting the flow of ideas or communications between students. What's even nicer is that when the instructor puts students "into groups" online, each group is able to work completely independently of the other groups. There are no background noises, conversations or happenings to distract the groups since they are basically placed into their own separate webinars.

Tips for a successful online synchronous learning experience

I am still learning to master some of these techniques myself, so don't be disappointed if they don't come to you overnight.

  1. Lecture for no more than 5 - 10 minutes. Even though your webinars and online faculty development training may be one hour lectures, that doesn't mean that's the ideal. In fact, consider how engaged you really were last time you had to watch a webinar lecture that was 20 minutes or longer. The other consideration is the fact that those webinars and training sessions are independent lessons; someone is just trying to throw as much information at you as they can in the allotted time and knows that it is not realistic to expect you to commit time before the webinar to complete assignments or related work. 
  2. Interact with the students every 5 - 10 minutes. This does not mean that you need to have a new full-blown activity every five minutes. It simply means that you should keep your students engaged. This should be an active and not passive learning experience. When you consistently ask your students to submit comments via chat or to share their opinion with the thumbs up/down feature, your students are more likely to stay alert and engaged with our lesson.
  3. If possible, bring in at least one other voice to break up the monotony (even if it is only for a minute or two via a video or audio clip.)
  4. Use a webcam or at least post a photo of yourself so that the students can connect with you as a person. Some people don't like to be on video so they choose to be a faceless voice. But statistics show that being able to see the instructor makes a significant positive difference for the students and adds an important touch of humanity to the experience. Also, if your students see you as "a real person", they are more likely to be respectful, gracious, and considerate when addressing you, whereas students who never get to see you can sometimes be more forceful when it comes to arguing a grade, or are more easily offended by your innocuous comments simply because a familiarity is lacking. Familiarity is a powerful tool that is in your favor.
  5. In your case, assuming you are going to host a recurring online synchronous session, you can set the expectation that your students will prepare for the session by reading, watching, researching, writing, or whatever they need to gather the necessary knowledge. I also suggest having them participate in discussion boards or turn in assignments prior to the session; this allows you time to read their work and assess their level of understanding coming in to the learning session. The information you gather will help you determine the topics that need to be covered in a lecture, and those that can be readdressed through activities or a follow-up discussion.
  6. Take advantage of your time with your students to have them participate in an activity that they will find engaging, and that you can use as an assessment tool. I'm not saying that you have to have a graded component to your synchronous session. What I am saying, however, that sometimes it is easier for instructors to recognize the source of student misunderstanding when we engage with our students in real-time. For example, we can give multiple choice math quizzes and realize that a student doesn't understand a concept. But when we see the student mark up the whiteboard explaining his thought process to the class, we may be able to pinpoint the exact source of his misunderstanding, which will help us offer better support to that student. Here are just three sample activities:
    1. Have students research and share images or short video clips (30 seconds or less) that show examples of a concept you relayed in the homework. They can each explain why they chose the specific image or video. For smaller classes, this can be done as a whole class discussion, whereas for larger classes, you may want them to present to one another in groups after having submitted the image/video to you ahead of time.
    2. You can show an image, text, diagram or video of your choosing and have the students discuss it in small groups. From there, they can present their thoughts as a group to the whole class. Their presentation may utilize the whiteboard, a screen share, and/or additional media found online.
    3. Use polling technology such as www.PollEverywhere.com or a built-in polling software (if your synchronous tool has one) and ask your students to respond to the prompt. Then have your students discuss the question as a group and respond to the prompt again. They can change their answers based on the group discussion or keep their answers as they were. After you close the polls, you can share the results and the correct answers with the students.

Wednesday, October 23, 2013

Yes, videos are useful tools for distance learning. But it is still a passive learning experience, right? Not necessarily...

Hearing but not listening

So you developed a great online or blended learning course; it looks as if your students are watching your videos at home, like they are supposed to. But they are still not performing well in their assessments... it is almost as if they are "hearing" but not "listening," "watching" but not "focusing" on the video presentations.

Our attention span for online videos

student talking on phone while on laptopThe truth is that in this fast-paced multitasking society, it is hard to get someone's complete attention, especially when asked to watch a video. According to video marketing research performed by Visible Measures, you lose 20% of viewers in 10 seconds or fewer, 33% by 30 seconds, 45% in 1 minute or less, and almost 60% by 2 minutes. Now these are marketing statistics and are not specific to education, but they do reflect our general attention span for watching online video.

What does that mean for us online and blended/hybrid teachers? It means that our students are probably folding laundry, cooking dinner, talking on the phone, or surfing the internet while "watching" our videos.

There are a lot of techniques we can use to increase the amount of attention students put towards watching our videos and this article will focus on just one: embedded interactives.

Embedded Interactives: Turning a passive video watching experience into active learning and engagement

For many of us, if we know we will have to perform a task after watching a segment of a video, we are more likely to focus because our attention will determine our success in the task. For students, if you award points for successful completion of the task, they have added motivation to pay attention to the video content. Plus, if you make the task(s) engaging, then it's plausible that some may complete the assignment out of sheer interest. Imagine that!

The Tasks

What are these tasks? They can be multiple choice or other quiz-type questions, participation in a discussion, a hotspot activity where students are asked to click on the correct part of a graph, document, photo, schematic drawing, etc. to show understanding, and there are many other possibilities if you take some time to think outside of the box.

But how do you actually create embedded interactives for your video?

A few options for creating interactives for your videos

You have a few options. Here are just a couple, which I recommend to my instructors.
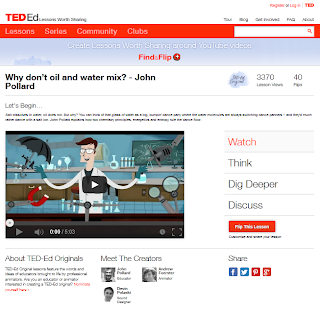
Ted Ed TedEd

Use TedEd "Find + Flip" to modify any YouTube video or any video of your own. Through TedEd's simple interface, you can add up to 15 multiple choice or open-answer questions, a "digging deeper" section where students can learn more, guided and/or open discussions, and concluding thoughts. These activities are presented in order (watch, think, dig deeper, finally...) This online application is very easy to use and free to all.

Camtasia Studio

Use Camtasia Studio to record your video, edit it (by adding in any number of special features such as title and subtitle pages, music, captions, high-quality audio editing, arrows and other callouts) and add in quiz questions. Your options are multiple choice, fill in the blank, short answer, and true/false. Camtasia Studio costs less than $200 if you purchase an education license. This software is relatively easy to learn but does require relative comfort with software applications. Experience with video editing software is a plus.


Blackboard (combine the powers of adaptive release with embedded video and Blackboard tests)

Blackboard adaptive releaseAt Harper College, our Learning Management System (LMS) is Blackboard. By using the adaptive release feature, instructors can embed videos and then have subsequent quizzes and activities populate in the course shell after the video is watched. Blackboard quizzes can be as simple as a series of multiple choice questions, but can include more sophisticated assessment features such as hotspot activities (which is where the student is asked to identify something in an image, and by clicking on the correct zone of the image s/he is able to indicate understanding. For example, you can show an image of a skeleton and ask your students to "click on the femur bone." The students would show understanding by clicking on the correct bone in the skeleton.)
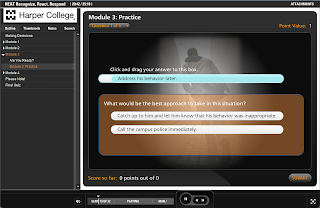
Articulate presentationArticulate

Some schools have Articulate, which is a robust add-on to PowerPoint that allows the user to create interactive learning modules. Here is an example training module created by the Harper College Center for Innovative Instruction in conjunction with the Harper Early Alert Team (HEAT). You'll notice it looks like an interactive PowerPoint contained in a useful user interface. The presentation was in fact created with PowerPoint, and the Articulate add-on is what gave it the user interface and interactive capabilities. If you select "Module 3: Practice" from the outline on the left, you can experience the power of Articulate at its best.

Wednesday, September 11, 2013

Screen Sharing with Your Students

I recently read a question in the LinkedIn group, techinEDU that I thought should be answered in a public platform, so here we go!
How Nearpod works, graphic from the Nearpod website

Here is the question:

Need software recommendation (online)

Looking for software that allows the teacher, from their computer, to pull up group work or group notes quickly.

Say its a group paper brainwork session and groups are working on chromebook independently and then the teacher wants to show off each groups notes to the whole class via a projector. Is there a "whiteboard" or note sharing type program made for this?

(The fall back is Google Apps and each group sharing the document with the teacher, but hoping for a more elegant solution.)

It sounded like this instructor wants to use this technology for a face-to-face learning experience, but you can also use some of these technological options for teaching at a distance. Here was my response:


I don't know much about Chromebooks, but here are a few recommendations for screen sharing. Some cost money and some are free.

1. Screen sharing with Skype.

Have all your students create accounts and then you can "call" them from your computer when it is their turn to share their screens. Read more about screen sharing with Skype.

2. Use Collaborate or another webinar/meeting software.

If your school has a Blackboard Collaborate account, schedule a Collaborate session during your class and you can use the screen sharing feature in Collaborate to project your students' work. You can also use other webinar and/or meeting software.

3. Apple TV with Airplay

If your students have Apple devices or if you school has Apple devices it can lend to your class, you can use Apple TV with Airplay. It's only $99 for Apple TV and I believe Airplay is free. It doesn't matter if the lectern computer is MAC or PC. It's just that your students' devices need to be Apple. You can read more about it in my blogpost, iPad Apps for Education Workshop Report. (This option only works for face-to-face sessions since I believe all students need to be on the same wifi network as the instructor.)

4. Nearpod for Apple or Android

If your students have mobile devices (Apple or Android) you can use Nearpod (a free download). Nearpod has reporting tools, the ability to control student devices (so they don't jump ahead or surf the net) and it works at a distance or for guided in-class learning.

Good luck!